Okay, so I’ve been seeing these amethyst crystal trees all over Pinterest and Instagram, and I finally decided to make my own. I’m not gonna lie, it looked kinda intimidating at first, but it turned out to be way easier than I thought!
Getting Started
First, I gathered all my materials. This was probably the hardest part, just because I had to order some stuff online. I needed:
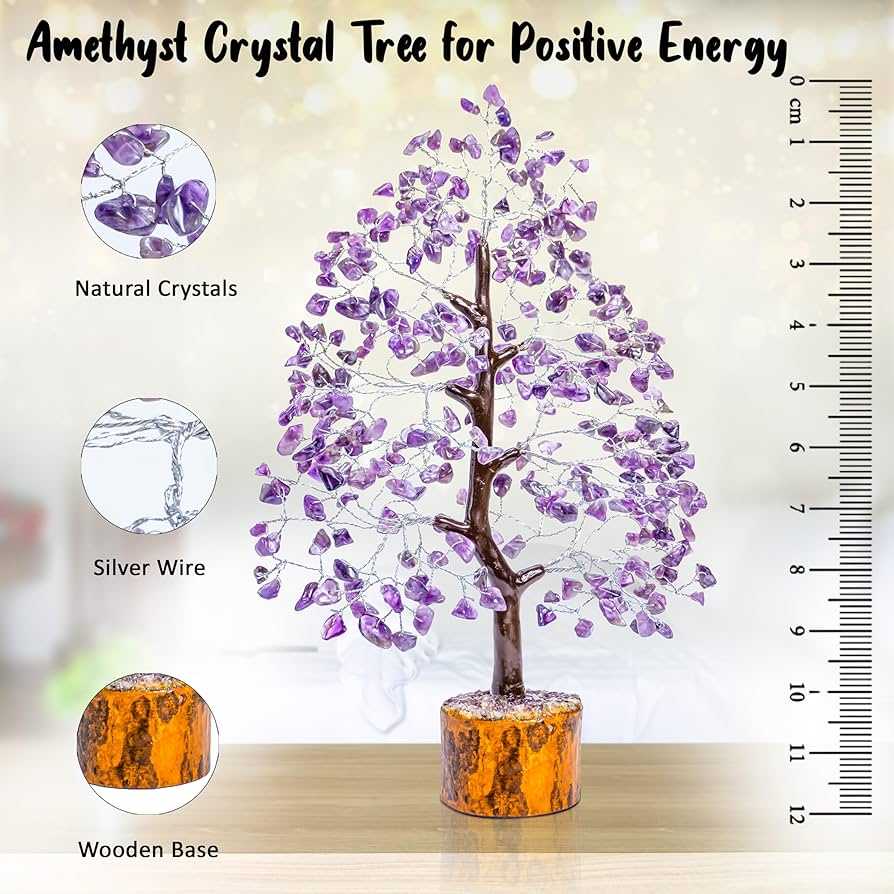
- Amethyst chips (I got a big bag of small ones)
- Wire (I used 24-gauge copper wire, seemed like a good thickness)
- A base (I found a cool, flat piece of driftwood at the beach!)
- Pliers (needle-nose are best)
- Wire cutters
- Some kind of glue (I went with a strong, clear-drying epoxy)
Making the Branches
I started by cutting a bunch of wire pieces. I didn’t really measure, just eyeballed it. Some were longer, some were shorter, maybe around 6-8 inches each? I figured I could always trim them later. Then, I took one piece of wire and strung a few amethyst chips onto it, leaving some space at the ends. I twisted the wire together a few times to secure the chips, making a little “branch.”
I kept doing this, making a whole bunch of these little branches. It was kinda therapeutic, actually. Just me, my wire, and my purple rocks. I made sure to vary the number of chips on each branch to make it look more natural.
Building the Tree
Once I had a good pile of branches, I started twisting them together. I took two or three branches and twisted their wires together at the base, forming a thicker branch. Then I added more branches to that, twisting and shaping as I went. It’s really all about just playing with it until it looks like a tree! Don’t be afraid to bend and adjust the wires. I use Pliers for better shaping.
I kept adding and twisting until I had a pretty good-sized tree trunk and a bunch of branches sticking out. It’s a little bit fiddly, but you get the hang of it.
Securing it to the Base
My driftwood base was already pretty flat, so I didn’t have to do much to it. I mixed up some of the epoxy and put a generous amount on the bottom of the tree trunk. Then, I carefully placed the tree onto the driftwood, making sure it was centered and stable. I held it in place for a few minutes while the epoxy started to set.
To make sure it was really secure, I added a little more epoxy around the base of the trunk, kinda blending it into the driftwood. I left it to dry completely overnight. That Epoxy smell bad.
The Final Touches
The next day, the tree was solid! I went back and adjusted some of the branches, bending them into a more pleasing shape. I also trimmed any extra wire bits that were sticking out. And that’s it! My very own amethyst crystal tree. It’s now in my work area, and look good.
Honestly, I’m super happy with how it turned out. It was a fun, relaxing project, and it looks way more impressive than the effort it took. If you’re thinking about making one, go for it! It’s totally doable, even if you’re not super crafty, and it will be really rewarding.