
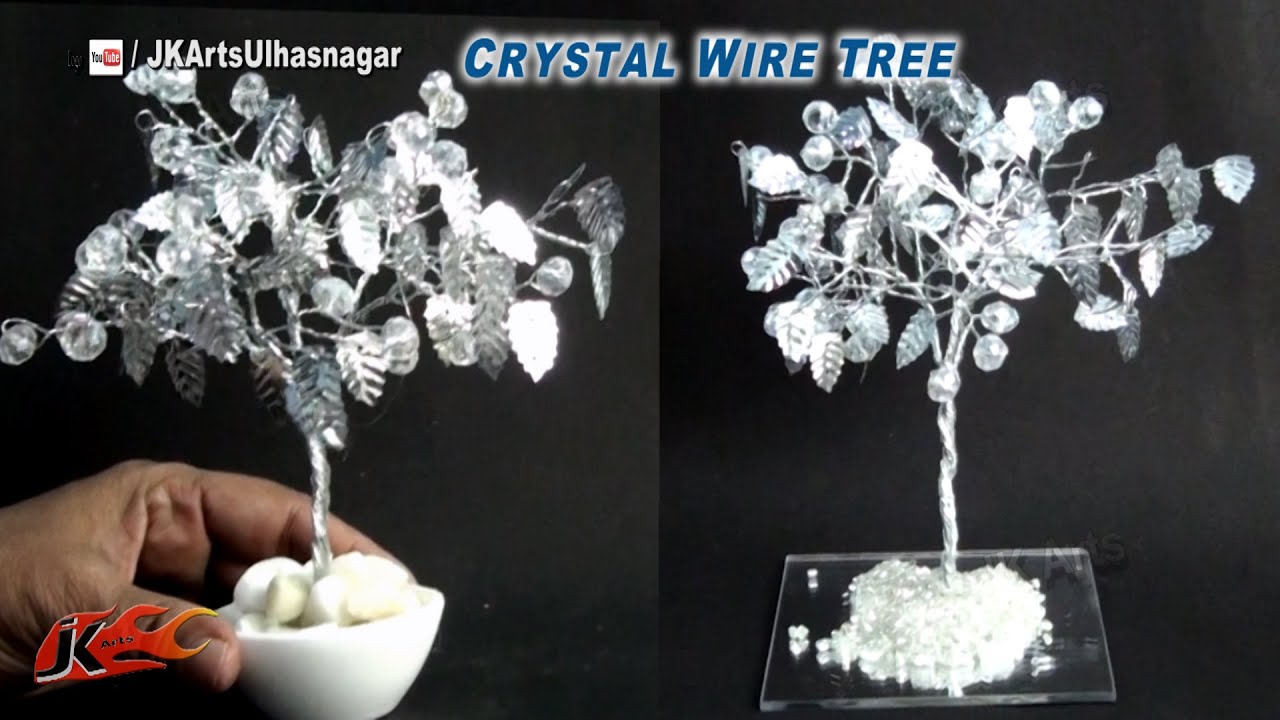
Okay, so I saw this cool thing online – a tree made of wire and crystals! I thought, “I can totally make that,” and jumped right in. Turns out, it was both easier and harder than I expected, but hey, that’s the fun of DIY, right?
Getting Started
First, I gathered my materials. I already had some jewelry wire from an old project, but I needed crystals. I went to a local craft store and picked out a bag of assorted crystal beads – different colors, sizes, the whole shebang. I also grabbed some wire cutters and pliers, because you can’t really work with wire without them.
Building the Base
The first real step was creating the tree trunk and roots. I took a bunch of wire strands (maybe 10 or 12?) and twisted them together tightly. This was a bit tough on the fingers, I won’t lie. I left some wires loose at the bottom to form the roots, spreading them out and twisting them a bit to make them look, well, root-like. I found that bending some back on the twisted part to thicken the trunk.
Branching Out
Next up: branches! I took smaller groups of wires from the main trunk and started twisting them outwards. This is where you can get creative – some branches longer, some shorter, some twisting upwards, some downwards. It’s all about making it look like a real(ish) tree. I kept adding more wire as needed, twisting and shaping until I had a decent branch structure.
Adding the Sparkle
Now for the fun part – the crystals! I took each crystal bead and threaded it onto the end of a branch wire. Then, I bent the wire back on itself and twisted it a few times to secure the crystal in place. This was a bit fiddly, and I definitely poked myself with the wire a few times. Ouch!
- Tip: I found that it was easier to add crystals to the smaller branches first, then work my way inwards.
The Final Touches
I continued adding crystals until I was happy with the look. I made sure to distribute the colors and sizes evenly-ish. I didn’t want one side to look too heavy or bare. Once all the crystals were on, I spent some time adjusting the branches, bending them here and there to give the tree a more natural, flowing *, I added super glue to keep the wires twisted together.
And… that’s it! My very own crystal wire tree. It’s not perfect, of course. There are some wonky branches and the wire twisting isn’t exactly professional-looking. But, I made it, and that’s what matters. It’s sitting on my desk now, catching the light and looking pretty darn cool, if I do say so myself.


