
Okay, here’s my blog post about making a wire tree with crystals, written in a casual, personal style:
So, I’ve been seeing these gorgeous wire trees with crystals all over Pinterest and decided, “Hey, I can totally make that!” Spoiler alert: it’s totally doable, but it definitely took some, uh, experimentation.
Getting Started: The Hunt
First, I gathered my materials. I already had a bunch of craft wire from previous projects (don’t we all?), so that was easy. I grabbed a couple of different gauges, some thinner, some thicker – just to see what would work best.
Then came the fun part: crystal shopping! I went to this local bead store. And I picked out a mix of small crystal chips and a few bigger, pointier pieces for the “leaves” and the base.
Twisting and Turning (and Untangling)
I started by cutting a bunch of wire pieces. The first, I’ll admit it, were a bit of a mess. I tried making the roots first, but they ended up looking like a tangled bird’s nest. I also tried to make the branches first, but they were too skinny and would not hold the heavier crystals. I cut so much wire, of so many lengths, I was starting to get frustrated!
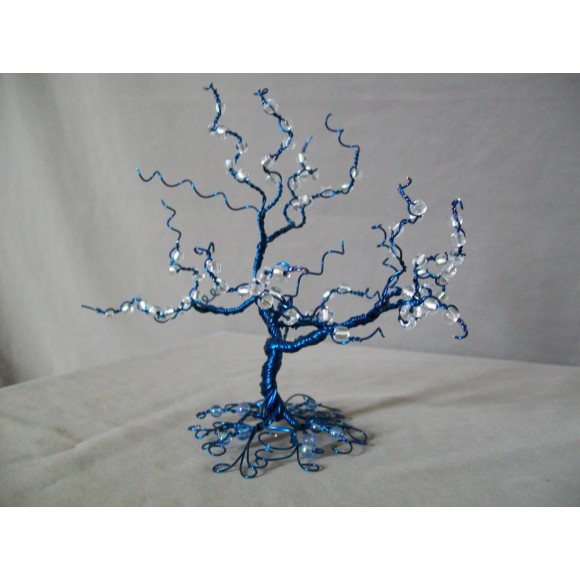
I went back to the drawing board, and this time cut around 20 pieces of wire, all about the same length (maybe 12 inches?). I held them together and started twisting them from the middle, forming the trunk. This worked way better! About halfway up, I separated the wires into smaller groups to make the main branches.
- Tip: Don’t twist too tight at first! You want to be able to adjust things.
Branching Out
Once I had the main branches, I took smaller pieces of wire and wrapped them around to create even more branches. This is where the thinner wire came in handy. It was easier to bend and shape. I kept adding and adding until it looked like a proper tree – or at least, a tree-ish shape.

This part took the longest, honestly. Lots of twisting, bending, and occasionally untangling myself from the wire. It was a good thing. My hands were sore from all that twisting!
Adding the Sparkle
Now for the crystals! I used the thinnest wire for this. I threaded a crystal chip onto a short piece of wire, then wrapped that wire around a branch. Rinse and repeat, about a million times. Okay, maybe not a million, but it felt like it!
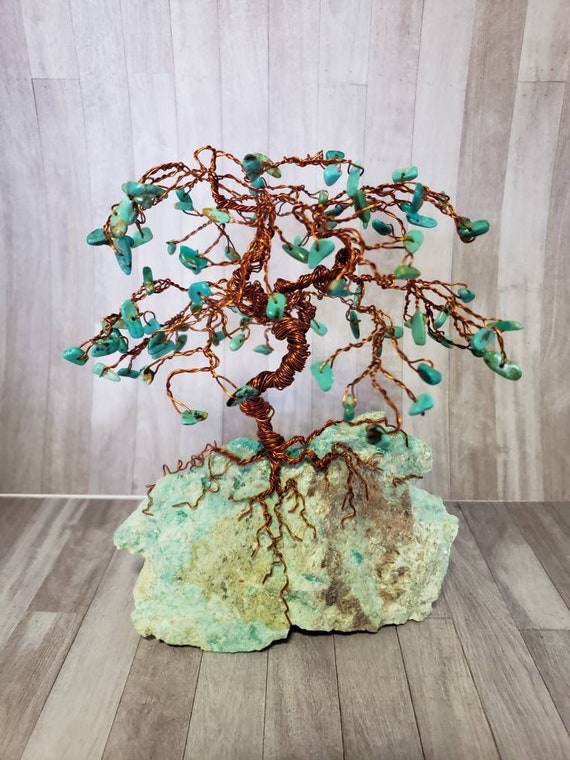
I tried to distribute the colors evenly, but also kept it a little random, you know, for that natural look. I used the bigger crystal points sparingly, placing them at the tips of some branches and at the base.
The Grand Finale (and a Little Oops)
Finally, I shaped the roots around a larger, flat crystal I had chosen for the base. I twisted and arranged them until the tree could stand on its own. And…it worked! Mostly. It was a little wobbly at first, so I added a few more wire supports to the roots. Problem solved!
I have to say, I’m pretty proud of how it turned out. It’s not perfect, but it’s mine. And it definitely adds some sparkle to my desk. I’ll for sure make another, maybe even a bigger one!


